SNAP Instructions
Instructions for use
To download these instructions click here

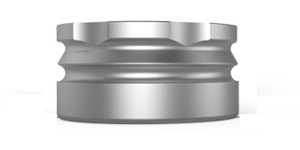
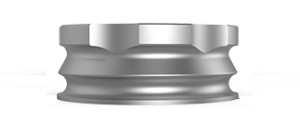
| 1) The SNAP system relies on the unique design of a retention ring made of PEEK, ii.e.Poly Ether Ether Ketone (PEEK).
2) The PEEK polymer shows excellent resistance to stress and plastic deformations, which extends the life of the product beyond the lives of other alternatives products that are available on the market. 3) The unique mechanical and elastic properties of PEEK allow for a large diameter of spherical retention, resulting a very strong grip force. The geometry of the titanium abutment (base unit ring) and the accompanying PEEK attachment create a large contact area, ensuring excellent stability of the prosthesis and comfort to the patients.
|
 |
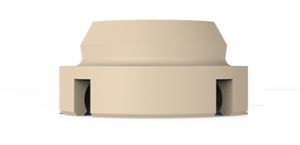
| 4) There is a variety of the attachments that can be used on the denture. All the attachments connect to the SNAP abutments: | |
|
OsseoDent® SNAP 5.6mm Metal Housing – OSD-SNAP-HS56 5.6 mm metal housing for SNAP overdenture. To be used in most cases as the default option |
OSD-SNAP-HS56 |
| OsseoDent® SNAP 4.8mm Metal Housing – OSD-SNAP-HS48
4.8 mm metal housing for SNAP overdenture. To be used when less space is available in the denture. |
OSD-SNAP-HS48 |
| OsseoDent® DIRECT PEEK Attachment – OSD-SNAP-DPA
4.8 mm dia. PEEK attachment, to be mounted without metal housing in cases with very narrow space |
OSD-SNAP-DPA |
| OsseoDent® PEEK High Retention Ring – OSD-SNAP-PAH
Retention ring for SNAP metal housings with 2.5 Lbs of retention |
OSD-SNAP-PAH |
| OsseoDent® PEEK Soft Retention Ring – OSD-SNAP-PAS
Retention ring for SNAP metal housings with 1.5 Lbs of retention |
OSD-SNAP-PAS |
__________________________________________________________________________________________________________________________________________________________________________________________________
SNAP ABUTMENTS
| SNAP STRAIGHT ABUTMENTS (Abutment bases connect to implants). |

|
| SNAP ANGULAR ABUTMENTS (can be mounted at three different angles: 9°,18°,30°) |

|
| SNAP COVER (can be mounted at four different heights: 2,3,4,5 mm) |

|
| SNAP – MULTI SYSTEM ADAPTOR (can be mounted at three different angles: 9°,18°,30°) |

|
| ANGLE AND HEIGHT CLIP GAUGE (Use the Gauge Kit for angle and height selection) |

|
 |
 |
 |
 |
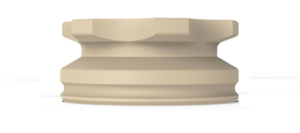
| 5) The wide contact area is possible because of the wide range of angles: 0°, 9°, 18°, 30° and wide range of heights: 1,2,3,4,5 & 6 mm. The availability of these options allows a near-perfect match for the contact areas between the titanium abutment (base unit ring) and the PEEK attachment |
 |
| 6) When mounting the SNAP SYSTEM, it is critical to verify up to 5° parallelism between the PEEK attachment and the base abutment |
 |
| For placement of SNAP straight abutments use a standard 0.050″ or 1.27 mm hex driver tool |  |
__________________________________________________________________________________________________________________________________________________________________________________________________
MULTI-SYSTEM BASE CONNECTION
MULTI SYSTEM BASE CONNECTION (Use the plastic holder to place the base connection into the implant)
 |
 |
__________________________________________________________________________________________________________________________________________________________________________________________________
CLOSED TRAY IMPRESSION COPING
| Connect the transfer onto the abutment. Inject impression material and position the impression tray |
 |
| Send the impression tray to the laboratory with analogs |  |
__________________________________________________________________________________________________________________________________________________________________________________________________
SNAP FIXATION
STEP ONE:
Protecting Silicon Sealed Ring (CAT NO: OSD-SNAP-SSR)
should be mounted on the SNAP housing slot
 |
__________________________________________________________________________________________________________________________________________________________________________________________________
| STEP TWO: Hold without pressure until material is set |
 |
__________________________________________________________________________________________________________________________________________________________________________________________________
| STEP THREE: CONNECTION OF THE FINAL PROSTHETIC RESTORATION: Wise Click denture caps are placed. The Silicon Ring (OSD-SNAP-SSR) should be removed. |
 |
 |
 Please be aware that the PEEK attachment should be replaced if exposed to a temperature higher than 100°C.
__________________________________________________________________________________________________________________________________________________________________________________________________
PLACEMENT & REMOVAL OF RETENTION RINGS
| A) Replacing the PEEK retention rings is very simple. Threading the OSD-SNAP-TOOL into the threaded hole in the PEEK retention ring – will cause the ejection of the PEEK part, as shown. |
| B) Put the new PEEK retention ring into the opposite side of the special tool. |

|
__________________________________________________________________________________________________________________________________________________________________________________________________

|

|
|
In cases where there are significant differences in heights and angles, the patient should be instructed to press the prosthesis first at the front of mouth until hearing the engagement click and then tighten the back of the prosthesis until sensing the second engagement click. |